Mastering Stovetop Steak Cooking: Tips & Techniques

Intro
Cooking steak on the stovetop has a charm all its own, allowing one to bring rich flavors and textures straight from the kitchen to the table. This method, while seemingly straightforward, holds so many nuances that can significantly affect the outcome. Whether you’re a seasoned cook or just starting, your ability to create a perfectly seared steak can be a satisfying addition to your culinary skill set.
In this guide, we’ll take you through everything from selecting the right cut of meat to the final garnishing touch. You’ll also learn about timing, temperatures, and some nifty tricks to avoid common pitfalls. So roll up your sleeves, and let’s get started!
Ingredients:
To whip up a delightful steak dinner, you’ll need the following:
- 1 lb ribeye or sirloin steak (about 1 inch thick)
- Sea salt (1-2 teaspoons, or to taste)
- Freshly cracked black pepper (1-2 teaspoons, or to taste)
- 2 tablespoons olive oil or vegetable oil
- 2 tablespoons unsalted butter
- 3 cloves garlic (crushed)
- Fresh rosemary or thyme sprigs (optional)
Preparation Steps:
Now that you have your ingredients lined up, let’s walk through the preparation step by step:
- Choose your steak: Going with a ribeye or sirloin provides that perfect balance of tenderness and flavor. Choose meat that has a good marbling of fat.
- Bring to room temperature: Let the steak sit out for about 30 minutes before cooking. This ensures even heat distribution during cooking.
- Season generously: Sprinkle sea salt and black pepper on both sides of the steak. Don’t be shy about it, the seasoning is where much of the flavor comes from.
Technical Aspects:
Understanding the technical aspects is paramount:
- Temperature settings: Preheat your skillet on medium-high heat for 5 minutes. You want it hot enough to sear the steak quickly and lock in the flavors.
- Timing: Each side should cook around 4-5 minutes for medium-rare, turning the steak only once.
- Key techniques: Searing is crucial. Use an oil with a high smoke point, like vegetable oil, to prevent burning.
Cooking Process:
Follow these sequential steps for a flawless cooking experience:
- Heat the pan: After the skillet is hot, add the oil. You’ll know it’s ready when it shimmers.
- Sear the steak: Place the steak in the skillet and leave it alone for 4-5 minutes; this allows a golden crust to form.
- Flip and add butter: After flipping, add butter, garlic, and herbs. As the butter melts, spoon it over the steak to baste it for added flavor.
- Check doneness: Use a meat thermometer. Aim for about 130°F for medium-rare.
- Rest before serving: Take the steak off the heat and let it rest for about 5 minutes. This helps retain the juices.
Troubleshooting Tips:
Even the best of intentions can lead to hiccups. Here’s how to address common mistakes:
- If your steak is tough, it might have been overcooked, so keep an eye on the timing.
- For uneven cooking, always ensure your skillet is preheated and the steak is at room temperature.
- If the steak sticks to the pan, it likely isn’t hot enough; a well-heated pan should allow the meat to release easily with a gentle nudge.
"A well-cooked steak is not just about technique; it's a marriage of flavors, timing, and passion."
With this guide, you're well-equipped to master the art of cooking steak on the stovetop. The skills you develop will not only enhance your confidence in the kitchen but also ensure that each meal is savored to its fullest.
Understanding Steak Cuts
When it comes to cooking steak on the stovetop, understanding the various cuts of meat plays a crucial role. Each cut comes with its own unique characteristics that influence not only the cooking method but also the overall flavor and texture of the finished dish. Knowing which cut to opt for can make a significant impact on your culinary experience, leading to delightful outcomes or disappointing results. From ribeye's marbling to filet mignon's tenderness, each option has its own appeal, which can align with different cooking techniques and personal preferences.
Popular Cuts of Steak
Ribeye
Ribeye is widely recognized as a crowd-pleaser for good reason. This cut, taken from the rib section of the cow, is celebrated for its abundant marbling. The key characteristic of ribeye lies in its fat distribution, which lends the meat a rich, buttery flavor when cooked.
This cut shines in stovetop cooking due to its ability to remain juicy while developing a nice crust. One unique feature of ribeye is its balance of tenderness and flavor. However, it can be a pricier option, which might not suit every budget.
Filet Mignon
Filet mignon holds a special place in the hearts of many steak lovers due to its melt-in-your-mouth texture. Sourced from the tenderloin area, this cut is known for being the most tender steak available. Its key characteristic is its low-fat content, which makes it lean yet luxurious.
While cooking filet mignon, one should be cautious since its lack of fat means it can dry out if overcooked. This cut is perfect for special occasions or when you want a steak that feels elevated. Its delicate flavor, while delightful, can sometimes get overshadowed by heavier sauces.
T-Bone
The T-bone steak is essentially two steaks in one, featuring both a tenderloin and strip steak, separated by a bone shaped like the letter "T." This duality is its standout feature. The key characteristic that makes T-bone exceptional is the combination of textures and flavors, offering the richness of a strip steak and the tenderness of the tenderloin.
While a favorite for grilling, T-bone can also be adeptly cooked on the stovetop. However, it's important to ensure even cooking due to the difference in thickness between the two sides. The downside? T-bones can be challenging to manage, given their shape and size, which might not fit every pan.
Sirloin
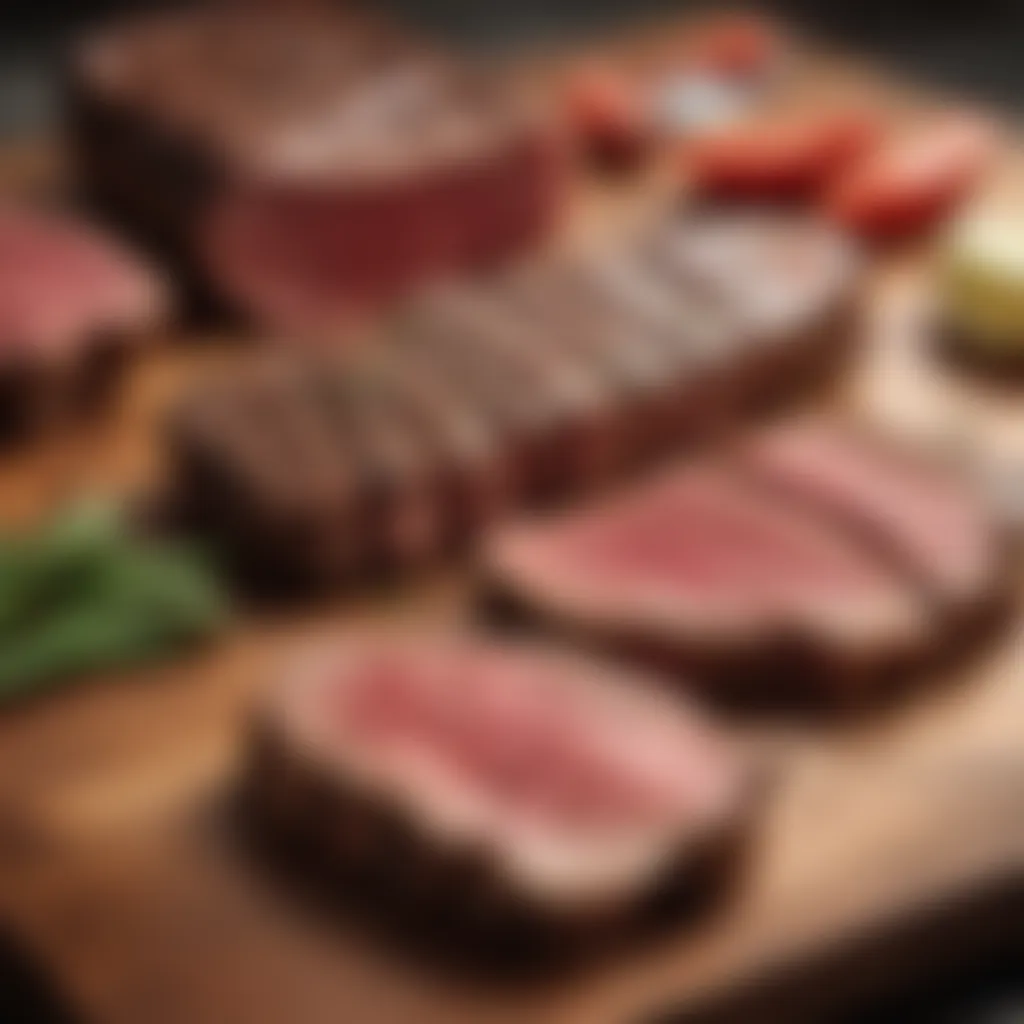
Sirloin is a versatile cut, offering a balance between flavor and affordability. This cut comes from the back of the cow and is known for being relatively lean, yet still packed with flavor. The key characteristic of sirloin is its ability to please a crowd without breaking the bank, making it a popular choice for weeknight dinners.
While cooking sirloin, the unique feature is its robust beefy flavor, which can shine brightly when seasoned well. One drawback is that sirloin can sometimes lack the tenderness of cuts like ribeye or filet mignon, hence proper cooking techniques are essential to achieve the best results.
Choosing the Right Cut for Stovetop Cooking
Thickness considerations
When it comes to stovetop cooking, the thickness of the steak is a paramount factor. Thin cuts can cook quickly, often leading to overcooking or uneven doneness if not monitored closely. Ideally, the thickness should be around one to one and a half inches for better control over the cooking process. A thicker cut allows for a better sear on the outside while maintaining juiciness inside, achieving that beautiful crust everyone craves.
Fat content analysis
Fat content plays a crucial role in flavor and moisture retention. For stovetop cooking, choosing cuts with adequate marbling, such as ribeye, can enhance the overall taste and texture. Lean cuts may need additional fat, like butter or oil, for flavor and moisture. Understanding how much fat is right for your dish can significantly affect the outcome, allowing for a more enjoyable steak experience overall.
Texture and tenderness factors
The texture and tenderness of the steak should always be in your consideration. Cuts like filet mignon offer incredible tenderness, but their simpler flavors may necessitate additional seasoning or sauces to elevate the dish. On the other hand, tougher cuts, such as sirloin, can become tender with the right cooking techniques and marinades. Tailoring your choice based on desired texture can greatly influence not only your enjoyment but also the success of the steak on your stovetop.
Essential Tools for Cooking Steak
Cooking the perfect steak isn't just about technique; it also heavily depends on the right tools. The essential tools for cooking steak enable precision, creativity, and can lead to consistently juicy results. With the correct equipment, you set the stage for elevating your culinary skills, allowing for a steak that not only pleases the palate but impresses at a dinner table.
Skillets and Pans
The type of skillet or pan you use impacts heat distribution and overall cooking results. Each kind has its unique traits that can either enhance or detract from the cooking process.
Cast iron requirements
Cast iron skillets are well-loved for their superior heat retention and even cooking abilities. They, in fact, provide a fantastic sear on steak due to their ability to reach high temperatures and maintain them—a crucial aspect for achieving that elusive crust on the surface. However, a common requirement when using cast iron is proper seasoning. Seasoning not only protects the surface from rust but also adds flavor over time.
While cast iron is fantastic at creating a great sear, it can be a heavy choice. Once seasoned right, it can last a lifetime if cared for properly. One thing that often gives it an edge is its versatility; you can start cooking on the stovetop and easily transfer to the oven.
Stainless steel options
On the other hand, stainless steel pans offer their own set of advantages. They are typically lighter and often come with a solid, non-reactive surface, meaning they don't impart any unwanted flavors into the steak. They also heat up quickly and are very responsive to changes in temperature, which is ideal for making adjustments while cooking.
Moreover, they are dishwasher safe and resistant to staining and scratching. However, a consideration is that it can take time to learn how to manage heat properly, as stainless steel doesn’t retain heat in the same way as cast iron. The learning curve is worth considering.
Non-stick alternatives
Then there's the non-stick route. Non-stick pans can be an easy choice for beginners. They allow for less oil usage, and cleaning is a breeze, making it convenient for some cooks. Just make sure you're picking a non-stick pan that can handle higher heat because the last thing you need is peeling coating in your food when searing steak.
The beauty of non-stick is its ease; you can enjoy a flawless cook without worrying too much about sticking issues. However, the draw back is they will not yield the same flavor depth compared to cast iron or stainless steel due to the lack of fond created when browning meat.
Meat Thermometers
A meat thermometer is arguably the most invaluable tool in your kitchen for cooking steak perfectly. Knowing the internal temperature is essential to avoid the catastrophe of an undercooked or overcooked steak.
Types of thermometers
When you look into types of thermometers, you often find two main categories: instant-read and probe thermometers. Instant-read thermometers are fantastic for a quick temperature check. Simply insert them into the thickest part of the steak for an accurate reading in seconds. They are portable and easy to handle, but you’ll have to repeatedly check the temperature as you cook.
Probe thermometers, in contrast, remain inside the meat the entire cooking duration, allowing for constant monitoring. They often come with features like alarms for desired temperatures. They can help you keep an eye on your cook without opening the pan multiple times, which might let heat escape. Yet, they require a bit of setup and might be pricier than instant-read options.
How to use a thermometer effectively
Using a thermometer might seem straightforward, but there are nuances. First, ensure you insert the thermometer into the thickest part of the meat and avoid touching the bone since that can lead to inaccurate readings. Also, take care to wait a few seconds for the device to stabilize before checking the reading.
The importance of knowing how to use a thermometer effectively is paramount as this ensures that your steak reaches the desired doneness—be it rare, medium, or well-done. Thus, integrating this tool into your cooking process takes the guesswork out and leads to consistently delightful results.
"A well-cooked steak is like poetry in motion; it deserves the care only the right tools can provide."
Preparation Techniques
When it comes to cooking steak on the stovetop, preparation plays an essential role in achieving that mouth-watering result. This phase can greatly influence the final texture and flavor of the steak. First and foremost, one must consider the fundamentals of thawing, drying, and seasoning to ensure a well-cooked and appetizing dish. The attention given to these steps not only elevates the steak's taste but also contributes some valuable skills to your culinary repertoire.
Thawing and Drying

Best practices for thawing
Thawing is a critical step that many may overlook. The best practice here is to thaw in the refrigerator, allowing the steak to gradually come to a suitable temperature over time. This method maintains the meat's texture and flavor, as it doesn't expose the steak to extreme temperature changes, which can lead to a loss of moisture. It’s wise to plan ahead; leaving the steak overnight may seem tedious, but it guarantees a consistent cooking process, resulting in a tender and juicy steak.
"A well-thawed steak is half the battle won."
Alternatively, if pressed for time, submerging the steak in a sealed plastic bag in cold water can also do the trick. However, this method requires more attention and should never entail leaving the steak out on the counter. Keeping it cold ensures bacteria doesn't get a foothold.
Importance of drying
Once thawed, drying the steak is just as significant. Patting the steak dry with a paper towel removes excess moisture, paving the way for a perfect sear. A dry surface allows for that beautiful brown crust to develop, enhancing flavor through the lovely Maillard reaction—where sugars and amino acids dance together to create complexity in taste.
To achieve that flavorful crust, it’s best to let the steak rest uncovered for about 30 minutes before cooking. Doing this not only dries the steak but also allows it to reach room temperature, promoting even cooking. While it might seem minor, skipping this step can lead to a less satisfying texture and flavor.
Seasoning Methods
Basic seasoning guidelines
Don't underestimate the power of seasoning. The basic guideline is simple: salt and pepper. These two ingredients go a long way. Salt enhances natural flavors while also contributing to moisture retention during cooking. Giving the steak a good sprinkle of kosher salt at least 40 minutes before cooking can make a world of difference, as it allows the salt to work its magic, drawing out moisture and then reabsorbing it, thus intensifying taste.
The beauty of seasoning lies in the freedom to customize it. You might choose to add some garlic powder for depth or rosemary for an aromatic touch.
Advanced marinade techniques
For those who want to take it a notch higher, advanced marinade techniques can infuse flavors that are out of this world. Marinades typically involve an acidic component, an oil, and various seasonings. By letting the steak marinate for several hours or overnight, the acid tenderizes the proteins while the oil helps to lock in moisture.
Consider a marinade of soy sauce, garlic, olive oil, and a hint of honey. The balance of sweetness and umami will play well on the palate, making every bite a delight. Just remember to pat the steak dry after marinating to avoid steaming it in the pan.
Cooking Techniques
Cooking techniques play a crucial role in the successful preparation of steak on the stovetop. They serve as the backbone of culinary skill, determining how well flavors develop and how textures achieve that coveted mouthfeel. Mastering techniques such as searing and basting not only influences the steak's taste but also enhances its visual appeal. For a housewife aiming to elevate family dinners, these techniques can transform an ordinary meal into an unforgettable dining experience with relatively little fuss.
When it comes to steak, the art is in the details. Understanding the right methods helps ensure that the final product is juicy, flavorful, and something to rave about. With a steady hand and the right approach, anyone can achieve professional results from the comfort of their home kitchen.
Searing the Steak
Understanding the Maillard Reaction
The Maillard reaction is a chemical process that occurs when proteins and sugars in the meat react under high heat, creating complex flavors and a beautiful brown crust. The beauty of this reaction lies in the well-rounded flavors it brings to the table. If you want that rich umami essence in your steak, mastering this concept is essential. It’s what turns a simple piece of meat into a gastronomic delight.
One key characteristic of the Maillard reaction is its ability to create a depth of flavor, which cannot be achieved by other cooking methods, such as boiling or steaming. This is why it's often hailed as one of the most important techniques in cooking steak.
However, one must exercise caution while utilizing this technique. Overheating could lead to burnt surfaces, overshadowing the intended flavors. Thus, it's crucial to strike a balance and control the heat carefully.
Optimal Temperatures and Times
Achieving the right temperature for cooking steak can feel like walking a tightrope. It demands precision and experience. Cooking at optimal temperatures ensures that the Maillard reaction unfolds correctly without compromising the meat’s juiciness. Different cuts may require different cooking times, depending on thickness and desired doneness.
Aim for a hot skillet, typically around 400-450°F (about 200-230°C) for a good sear. This temperature range allows the exterior of the steak to brown beautifully while keeping the inside tender and juicy. The unique feature of this approach is that it provides a guideline while still allowing for adaptability based on personal preferences.
The downside? It can be easy to get distracted during the cooking process, leading to overcooked steaks. Establishing a methodical approach and using a reliable thermometer can help prevent such mishaps.
Basting for Flavor
Using Butter and Aromatics
Basting is another technique that significantly enhances steak cooking on a stovetop. By continuously spooning melted butter, optionally mixed with aromatics like garlic or thyme over the steak, you add extra layers of flavor while also achieving a moist texture. This technique is not just about flavor—it’s all about enhancing that gorgeous sear.
The delightful thing about using butter and aromatics is how they complement the natural flavors of beef, creating a mouthwatering experience. This method is popular because it elevates even the simplest preparations into sophisticated cuisine.
However, there's a need to be cautious; using too much fat can cause the steak to become greasy rather than juicy. A moderate hand is key here, where you flavor without overwhelming the dish.
Techniques for Effective Basting
To get the most out of basting, it’s essential to understand the timing and method involved. Effective basting encourages continual infusions of flavor, keeping moisture locked in the steak. Use a spoon to scoop the melted butter and drizzle it over the cooking meat every minute or so. This simple technique can significantly enhance juiciness and flavor concentration.
The unique feature of effective basting is its adaptability; you can use different fats and herbs depending on the flavor profiles you’re after. However, it can be tricky to perfect. Some might argue that too much movement in the pan can disturb the searing process.

Ultimately, finding the right balance between basting and maintaining that beautiful crust will take practice, but the results will speak for themselves.
"It's like a dance between the steak and the pan, requiring focus and an instinct for timing to achieve harmony."
By understanding and applying these cooking techniques, a fledgling home cook can enhance their skills and create delicious steak dishes anytime they wish.
Resting and Serving the Steak
Cooking the perfect steak goes beyond just the sizzle and seasoning. How you rest and serve it is equally crucial. Resting allows the juices to settle, creating a tantalizing, juicy bite instead of a dry mouthful. It’s one of those simple steps that can take your steak game from bland to grand without much hassle.
Importance of Resting
Allowing juices to redistribute
After cooking, the juices inside a steak move around like they own the place. When you slice right into that hot slab, the juices don't just spill out; they draft a retreat to the edges, leaving behind a less juicy steak. Allowing the steak to rest gives it time to redistribute those luscious liquids. By the time you cut it, the juices are well-mixed, leading to a tender and flavorful morsel with every bite.
This aspect is not only about moisture but also enhances the overall flavor. Think of it as letting a fine wine breathe — it allows the essential flavors to develop and come forward. This is why resting is considered such a beneficial choice for achieving better results.
The unique feature here is timing. A steak generally requires about 5-10 minutes of resting time, depending on its size. This means when you grill or fry your steak, factor in some downtime. Otherwise, you might end up with a tough meal you’ll wish you could take back. So, giving that time isn't just an afterthought; it's a strategy for success.
Determining resting times
Resting isn’t one-size-fits-all; different cuts need different durations. A thick ribeye might need 10 minutes or more, while a slender filet mignon might be just fine with 5. Understanding the resting time is vital. It's like tuning a guitar; the right note can make all the difference.
This routine adds to the overall cooking process's effectiveness, ensuring that each bite is not only flavorful but also satisfying. It’s a beneficial practice baked into cooking steak, providing that uniform taste and texture you want. It’s better to let it rest for a few extra minutes than to risk a lesser meal.
Serving Suggestions
Plating techniques
Once your steak has rested, the way you present it can elevate your dining experience. Plating techniques are all about aesthetics but also about showcasing what you worked hard to prepare. Arranging your steak artfully will not only impress but can also engage the palate with presentation alongside flavor. Aim for a rustic touch, perhaps with a sprig of rosemary as a garnish.
A unique feature of plating your steak is layout. Consider slicing the steak and fanning it out; that way, it invites diners to dig in immediately. Just be careful to not overdo it — less is often more when it comes to how you put your plate together. This subtle artistic expression can impact how someone feels about the meal before they even start eating.
Pairing with sides and sauces
The last step in serving is all about what accompanies your steak. Think of pairing like making the perfect match; sides can enhance or clash with the main dish. Roasted vegetables, creamy mashed potatoes, or a fresh salad all have their role. The key characteristic here is balance. You want to find flavors that complement the richness of the steak while offering some contrast.
Don’t overlook sauces either. A classic red wine reduction or a robust chimichurri can add layers of flavor that liven up the plate. However, be cautious — instead of pouring sauces liberally all over the steak, consider serving them on the side. This tactic lets diners choose their adventure, enhancing the enjoyment while not overpowering your deliciously prepared steak.
Common Mistakes to Avoid
Cooking steak on the stovetop can be a rewarding but challenging endeavor. A common pitfall is making mistakes that can lead to less than stellar results. By avoiding these missteps, home cooks can elevate their steak game significantly. Understanding what not to do, such as overcooking or neglecting resting times, is crucial. Each mistake has its own consequences that can impact the flavor and texture of the steak, potentially ruining a nice cut of meat. This section will break down the most common miscalculations in stovetop steak cooking, ensuring you get it right every single time.
Overcooking the Steak
Signs of overcooking
Recognizing the signs of overcooked steak is essential for achieving a mouthwatering dish. One of the most telling factors is the color; an overcooked steak tends to appear more gray than brown. This distinct lack of any rosy hue signifies the loss of moisture and vital flavors. In addition, the texture plays a big role; a well-cooked steak should be tender and juicy, whereas overdone meat feels tough and dry in your mouth. Another telltale sign is the internal temperature; if it exceeds 160°F, it’s likely much drier than you planned.
These indicators are not only useful for recognizing a cooking error but serve as practical guidelines for future efforts in the kitchen. Avoiding this pitfall leads to meat that keeps its juices intact, resulting in a more enjoyable experience at the dinner table. The unique feature of identifying these signs lies in their simplicity—they're easy to remember but can make a world of difference in your culinary outcome.
Adjusting cooking methods
If you find yourself facing overcooked steak, it’s critical to adjust your cooking methods accordingly. One practical step is to lower the heat slightly. Cooking at a moderate temperature allows for a more even doneness without drying out the surface too quickly. Additionally, consider altering your cooking times based on the thickness of the steak; thicker cuts will need less intense heat for a longer duration, while thin steaks can cook faster but still require constant attention.
This importance of adapting cooking methods cannot be overstated. It gives cooks flexibility, ensuring they cater to the specific cut and thickness of the meat at hand. By making these thoughtful adjustments, you'll foster an environment conducive to juicy, tender results—key attributes sought after in any steak dish.
Neglecting to Let the Steak Rest
Consequences of cutting too early
When it comes to serving steak, many might feel the urge to cut it immediately after it leaves the stovetop. But this could be a costly mistake. Cutting too early isn’t just a mere inconvenience; it disrupts the natural redistribution of juices formed during cooking. What this means is that once the steak is cut, all those flavors, which should ideally be retained within the meat, start to leak out onto the cutting board instead of enhancing the overall taste.
This is an overlooked but essential aspect of steak preparation. By respecting the resting process, you allow the juices to settle back into the meat, ensuring that each bite is succulent and brimming with flavor. Failing to establish this crucial step can leave you with a steak that's tasty but far less satisfying than it could have been.
Establishing a resting routine
Creating a consistent resting routine can significantly improve your steak cooking practice. A good guideline is to let the steak rest for about 5 to 10 minutes after cooking, depending on the thickness. This small wait time fosters a chain reaction in moisture retention, aiding the cook in obtaining a lusciously juicy steak.
Moreover, this routine brings peace of mind—all cooks, whether seasoned or novice, can relax and enjoy the process. More than just another step, a resting routine becomes a key ritual that leads to better results. Understanding the uniqueness of this routine can foster a sense of confidence and purpose in the kitchen.
The power of avoiding common mistakes cannot be underestimated in the world of stovetop steak cooking. By remaining aware of these potential pitfalls, cooks can truly relish their culinary creations.


